3. Front Page
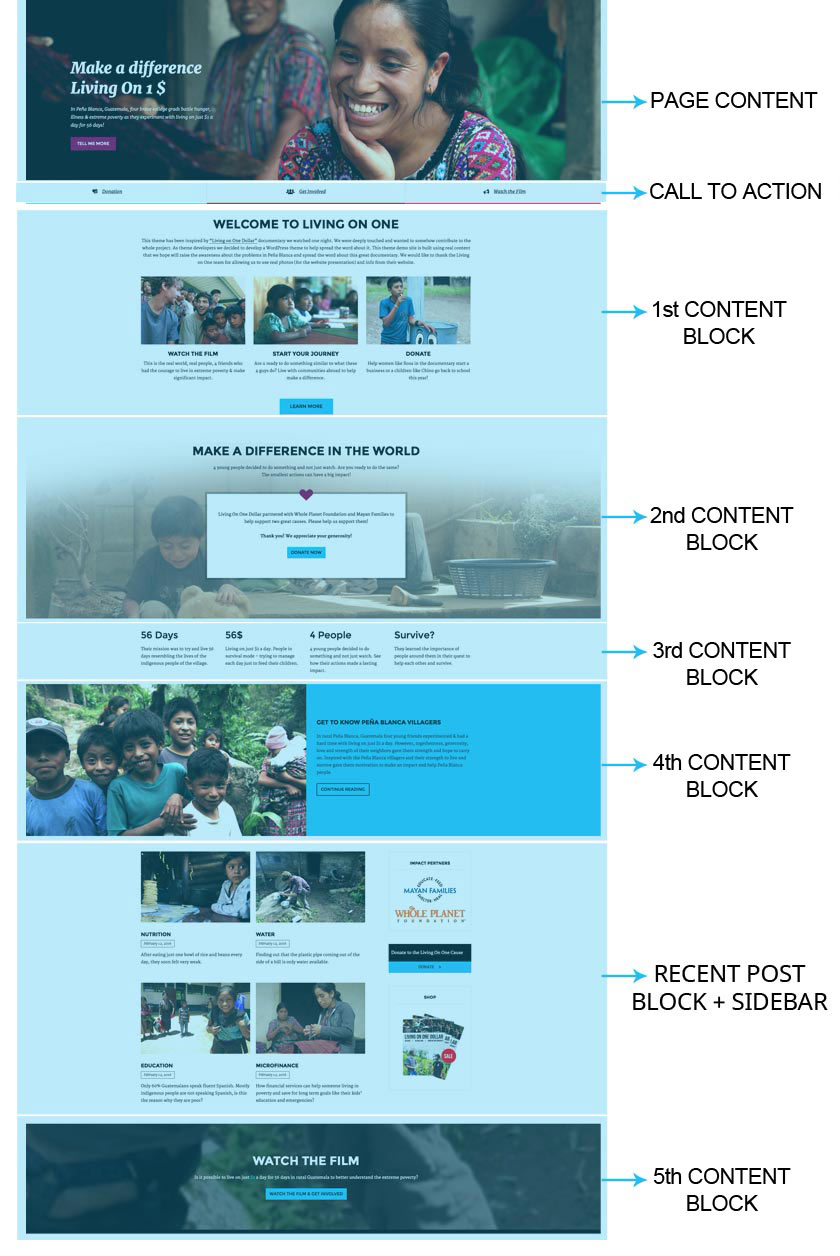
Front page is consisted of front page content, 5 content blocks and 2 widgetized content blocks (call to action and recent post). By using front page templates and options inside the Customizer you can create a front page quite different then the one we created for the demo. Here you can find a couple of examples and ideas to get better overview of what can be done.
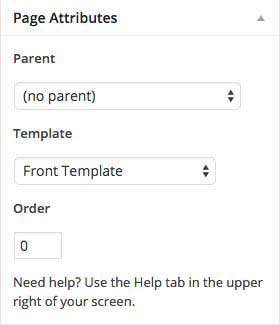
To start creating your front page you first need to create a new page and asign it to be your front page.
Navigate to the Pages and create a new page and name it (in the demo we named it "Home"). From the Page Attributes choose "Front Template" and click "Publish".
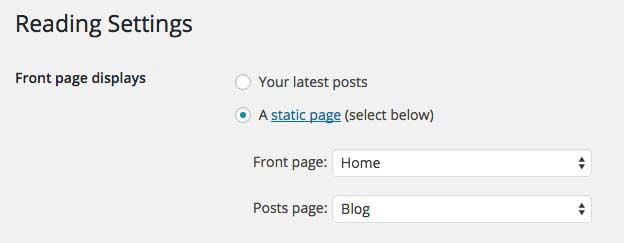
By default WordPress on the Front Page displays your latest posts.
If you want to set the page you created as your front page just navigate to the Settings » Reading and instead of the default "Front Page Displays: - Your latest posts" choose "A static page" and choose the page you created earlier. From the Posts Page dropdown select a page you want to use as your blog page.
3.1.1 Page Content
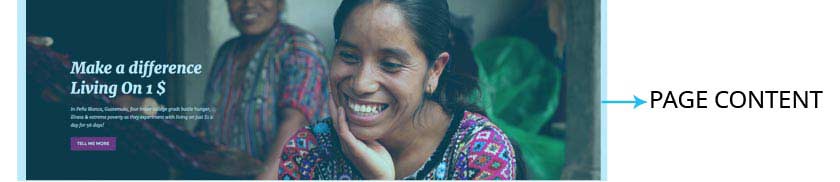
Navigate to Pages and open the page you created before, "Home". Inside the editor add your content and it will display on the front page.
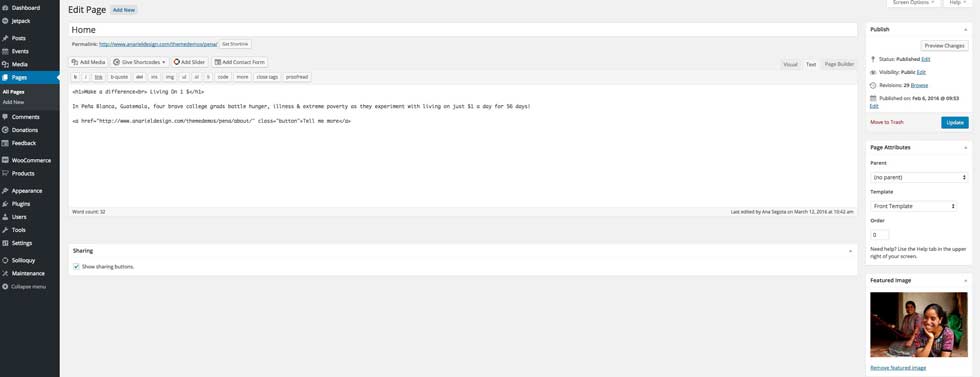
Content we added inside the editor is:
Size of the featured image as a background is 2600x1733px
3.1.2 Call To Action Block

Navigate to Appearance » Widgets and drag and drop "Pena: Three Column Call To Action" or "Pena: Four Column Call To Action" widget inside the Front Page Call To Action Block widget area.
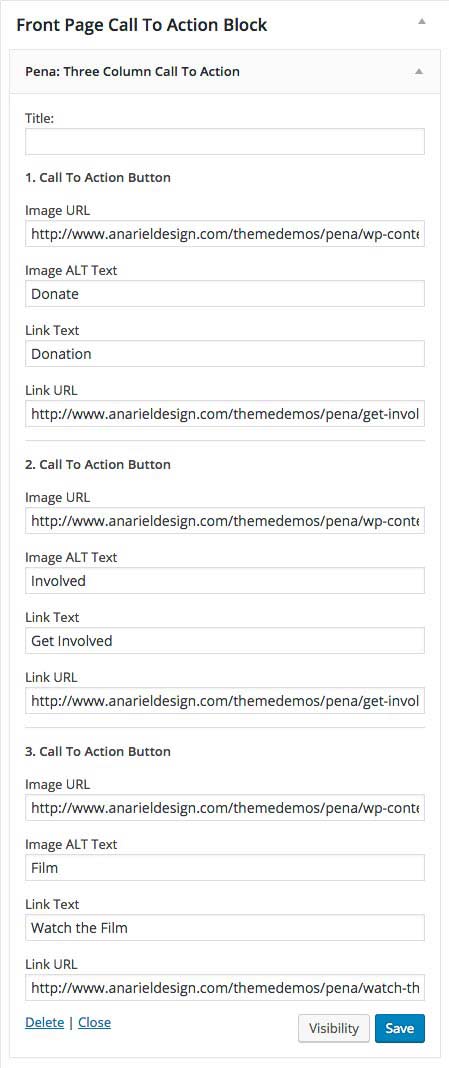
Add image url and write your own text and link url.
* If you don't want to have call to action buttons just leave the Front Page Call To Action Block empty!
3.1.3 First Content Block
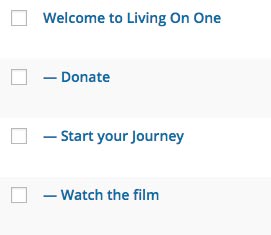
This block consists of 2 separate sections. Main section "Welcome to Living On One" that is a parent page and optional block that includes 3 child pages (Watch the Film, Start Your Journey, Donate).

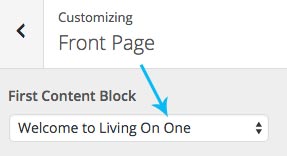
a) Main Part
Navigate to the Pages and open a new page, we named it "Welcome to Living On One". Inside the editor add the content you want to show in the main area. See below:
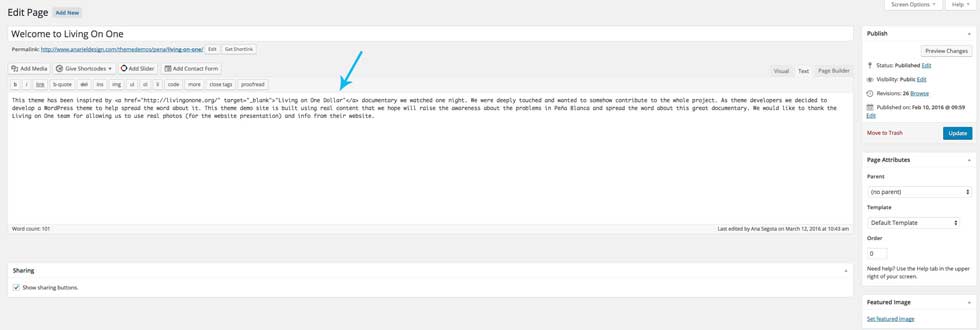
Once you are done with editing, open "Customizer" and inside the "Front Page > First Content Block" choose the page you created and it will show up on the front page.
b) Three Column Block

If you want to show three column block under the main content you'll need to open three different child pages (Watch the Film, Start Your Journey, Donate).
Inside the editor add the content you want to show and upload featured image (optional).
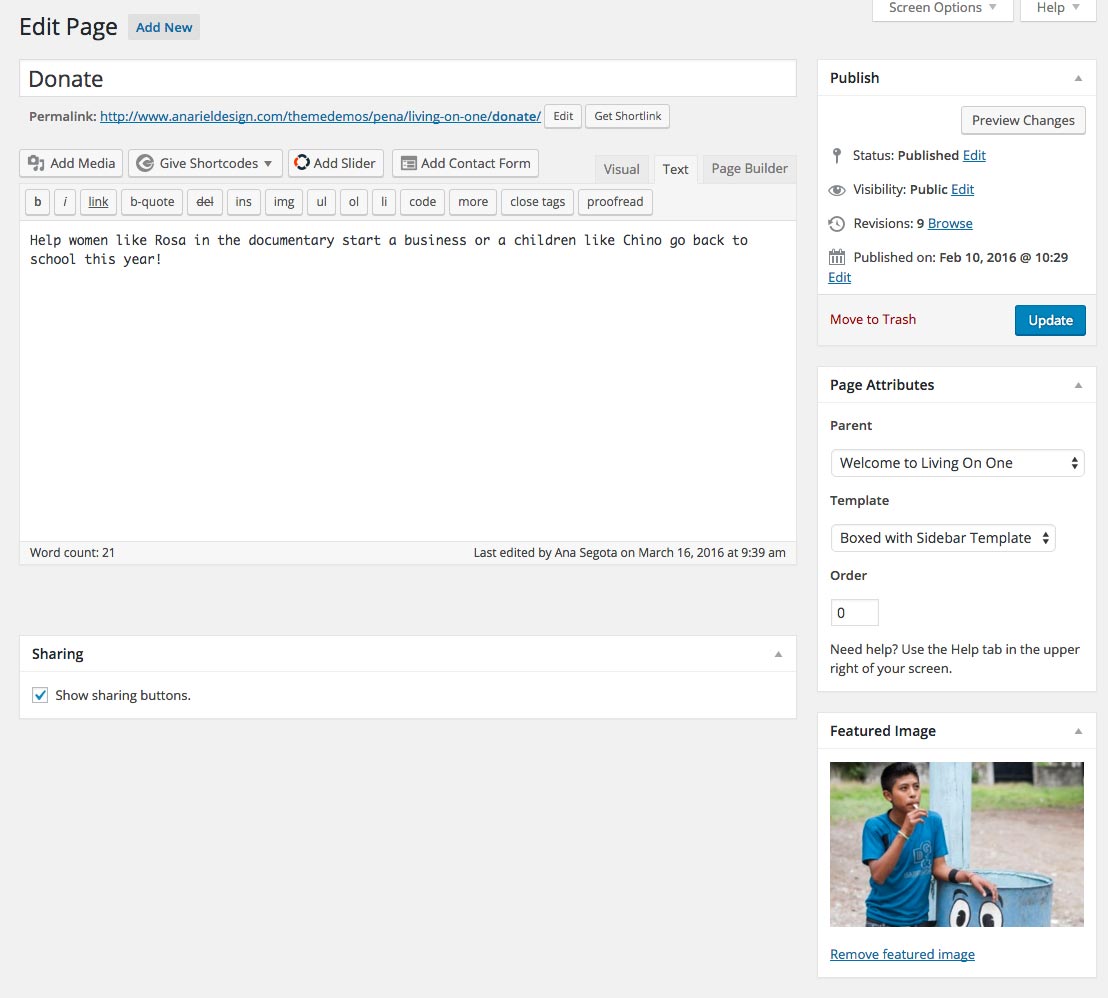
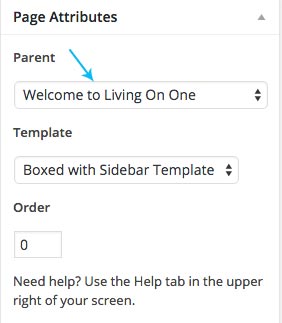
Inside the Page Attributes choose "Parent: Welcome to Living On One" or the name of the page you created above.
* If you want to show for example 6 child pages, you'll need to open six different child pages and they will show in two rows.
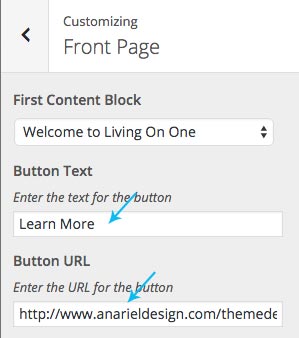
c) Blue Call to Action Button

Navigate to the Customizer > Front Page and fill the "Button Text" and "Button Link" if you want to show call to action button.
3.1.4 Second Content Block

Navigate to the Pages and open a new page, we named it "Make a difference in the world". Inside the editor add the content you want to show in the main area and upload your featured image. See below:
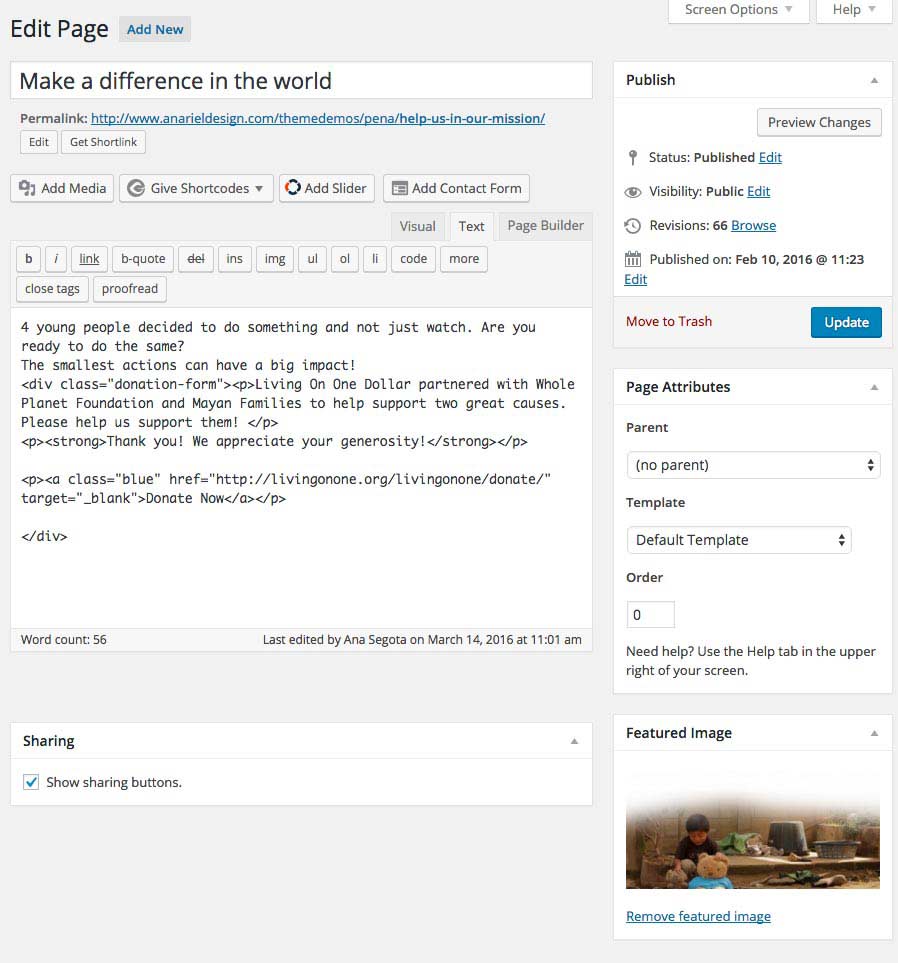
Once you are done with editing open "Customizer > Front Page" and inside the "Second Content Block" choose the page you created and it will show up on the front page.
If you want to have donation block like in the demo use this code inside the editor:
If you want to add blue button anywhere on the website use this code:
If you want to add purple button anywhere on the website use this code:
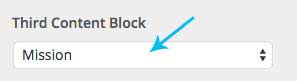
3.1.5 Third Content Block

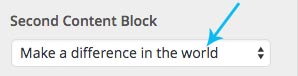
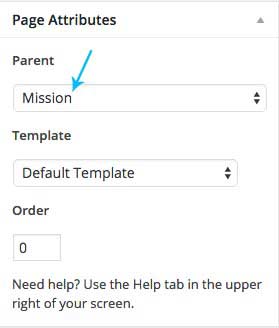
If you want to show four column block you'll need first to navigate to the Pages and open a new page, we named it "Mission". Next step is to open 4 different child pages (56 Days, $56, 4 People, Survive?).
Inside the editor of each child page add the content you want to show.
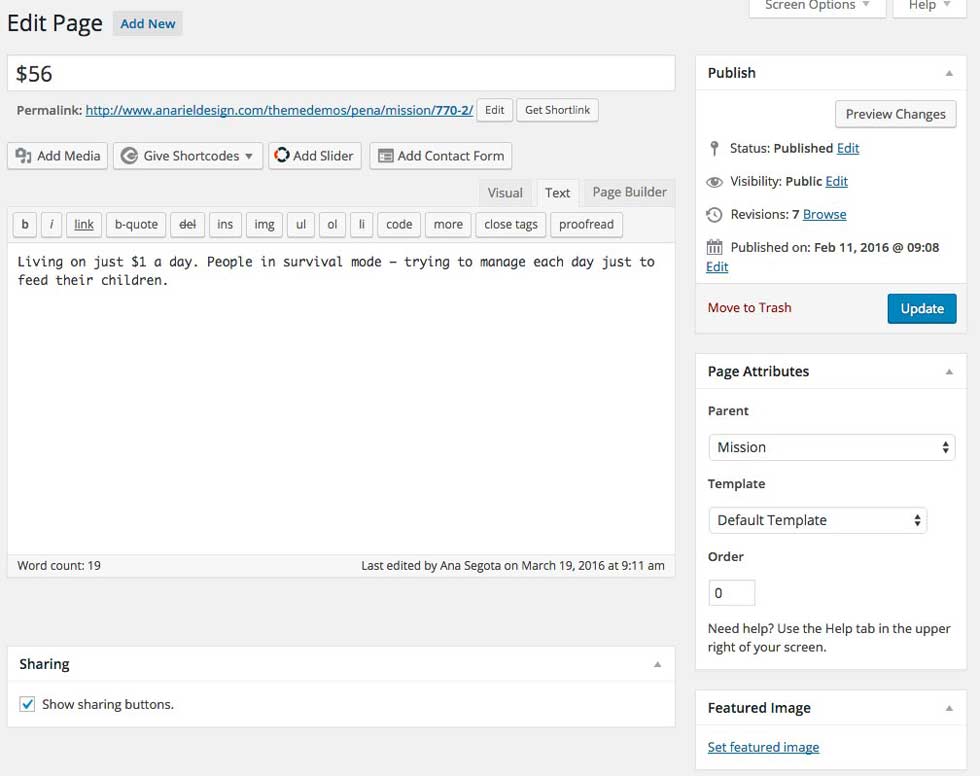
Inside the Page Attributes choose "Parent: Mission" or the name of the page you created above.
Once you are done with editing, open "Customizer > Front Page" and inside the "Third Content Block" choose the page you created and it will show up on the front page.
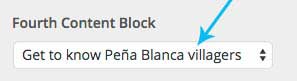
3.1.6 Fourth Content Block

Navigate to the Pages and open a new page, we named it "Get to know Pena Blanca Villagers". Inside the editor add the content you want to show in the main area and upload your featured image (1800x1800px). See below:
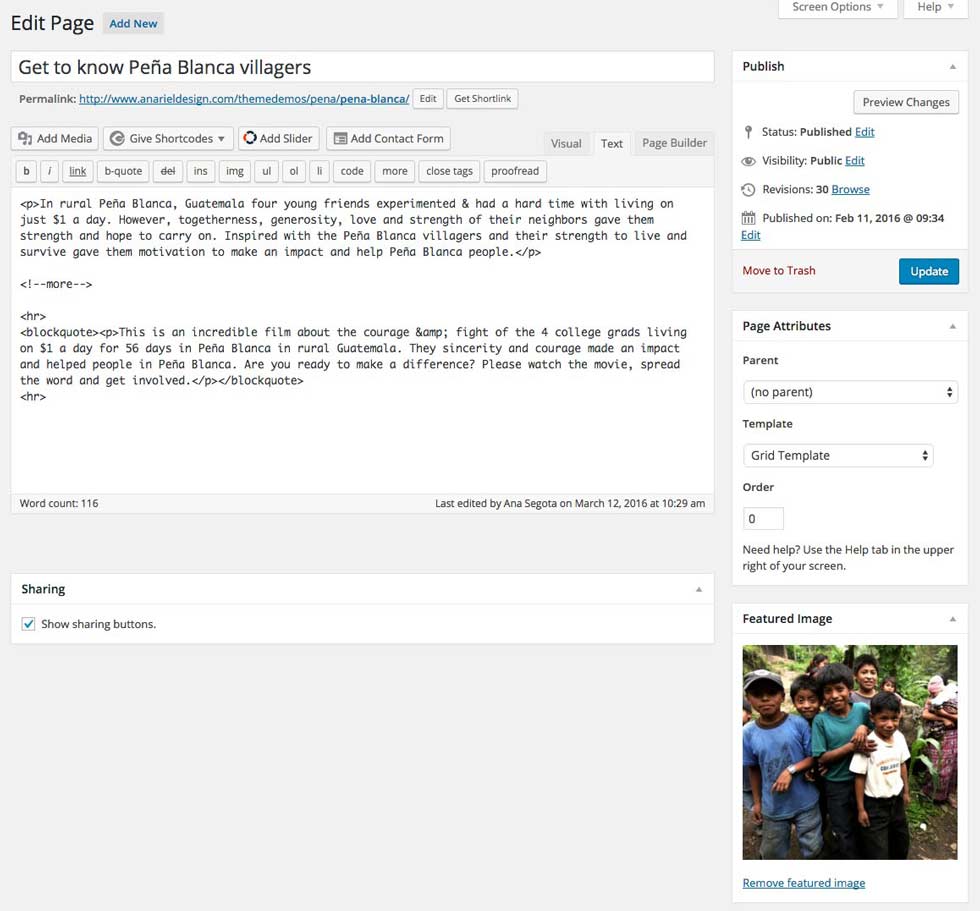
If you want to have "Continue Reading" button just add "More" tag inside the editor.
Once you are done with editing open "Customizer > Front Page" and inside the "Fourth Content Block" choose the page you created and it will show up on the front page.
3.1.7 Recent Post Block + Sidebar
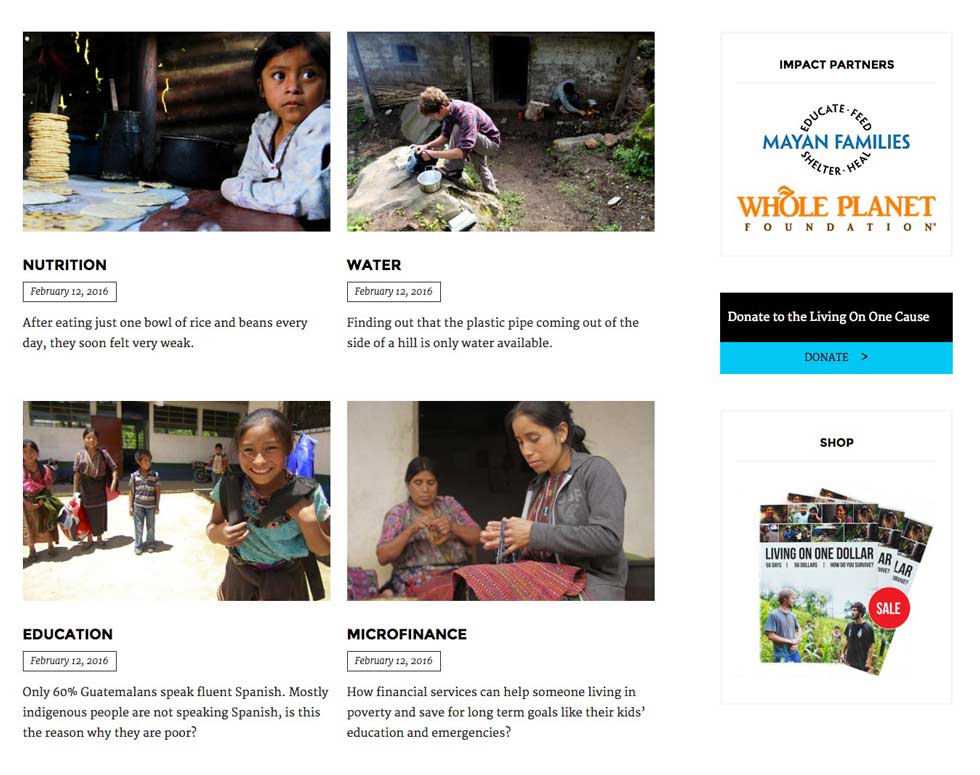
This part is widgetized. If you want to show recent posts with the sidebar please navigate to Widgets and drag and drop "Pena: Latest Posts" widget: you can choose number of posts, category, and a different number of columns (one, two,three and four columns) inside the "Front Page Recent Post Block".
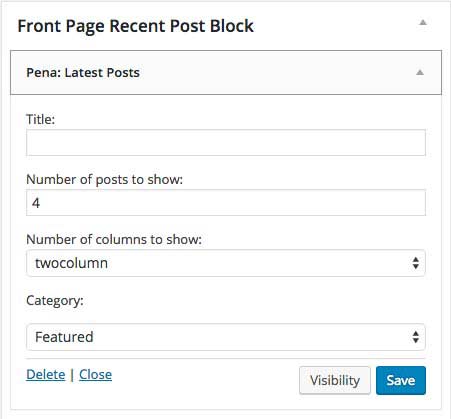
Widgets added inside the "Sidebar" will appear on the right side.
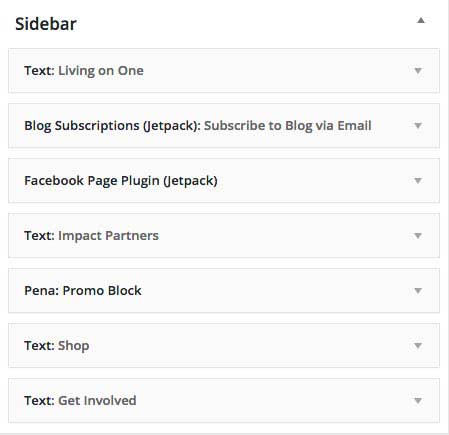
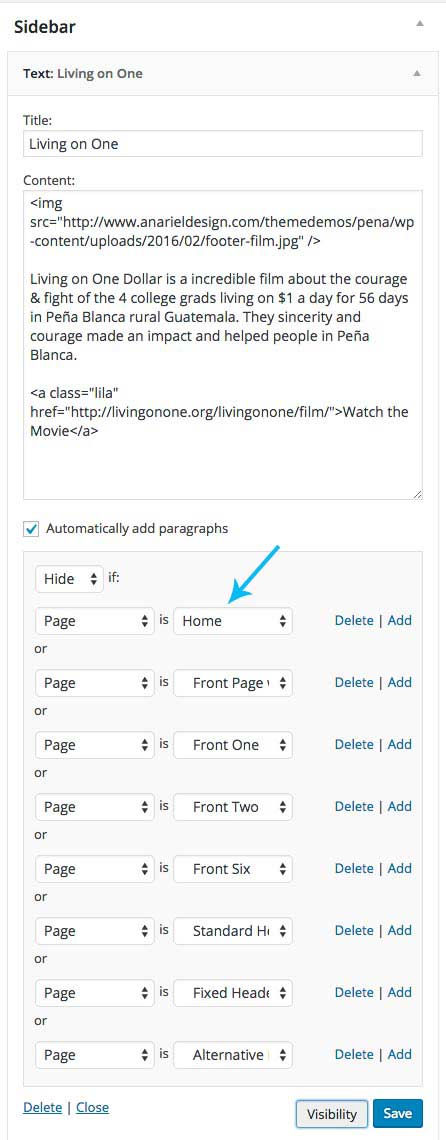
* Using the Jetpack plugin feature - Widget Visibility you can show different widgets on different pages using the same "Sidebar". Widget Visibility module enables you to configure widgets to appear only on certain pages (or be hidden on certain pages) by using the Visibility panel.
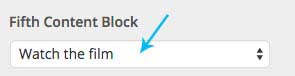
3.1.8 Fifth Content Block

Navigate to the Pages and open a new page, we named it "Watch the Film". Inside the editor add the content you want to show in the main area and upload your featured image (2600x800px). See below:
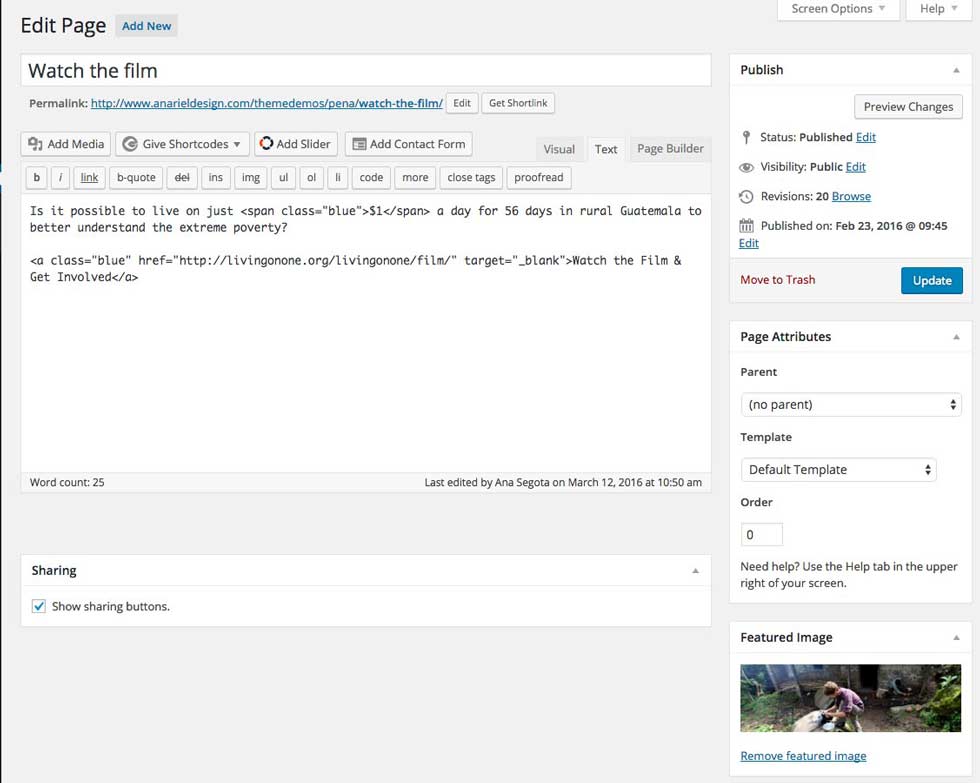
Once you are done with editing open "Customizer > Front Page" and inside the "Fifth Content Block" choose the page you created and it will show up on the front page.
If you want to add blue button use this code:
If you want to add part of the text in the blue color use this code:
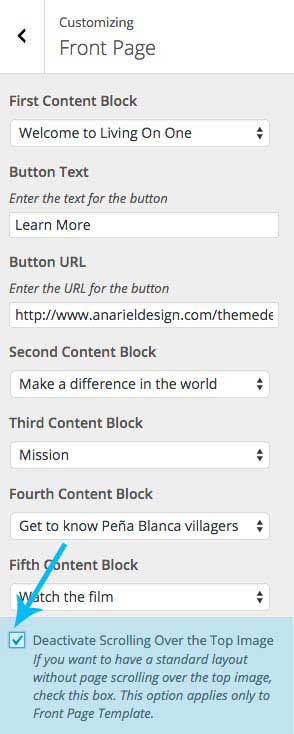
3.1.9 How to disable scrolling over the top image
Open "Customizer > Front Page" and check the "Deactivate Scrolling Over the Top Image".
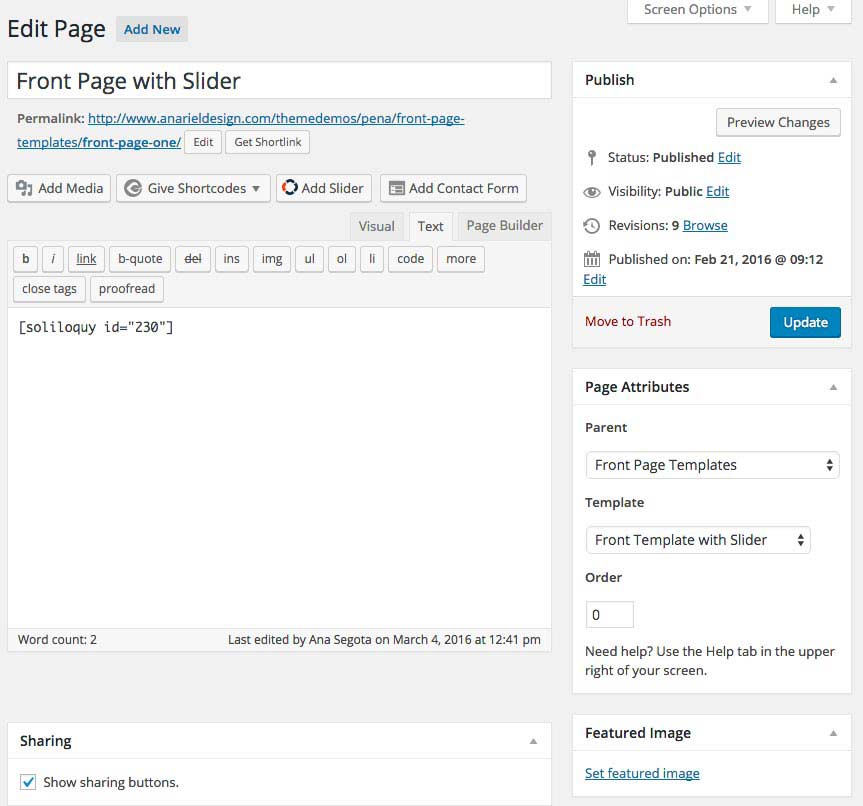
3.2 Front Page with Slider
The only difference between the "Front Template" and the "Front Template with Slider" is a slider that is displayed on top of the page instead of the featured image.
From the Page Attributes choose "Front Template with Slider" instead of the "Front Template". Into the editor add the shortcode of the slider you created.
Find more info about creating a slider here: