
Almost every website you’ll come across on the web features some kind of footer. The footer is not the most flashy party of a WordPress website, but it certainly has its purpose. It is often used to display information about the blog, shop, or organization behind the website. This often includes useful links, contact information, newsletter signup, and social sharing options. Before full-site editing ( FSE ) came out the footer was essentially a sidebar to which we added widgets. With the FSE we can create and customize the footer using the site editor. In this article, we’ll show you how to create a footer in WordPress using a modern block (FSE) theme. Let’s go!
How to Structure a Footer?
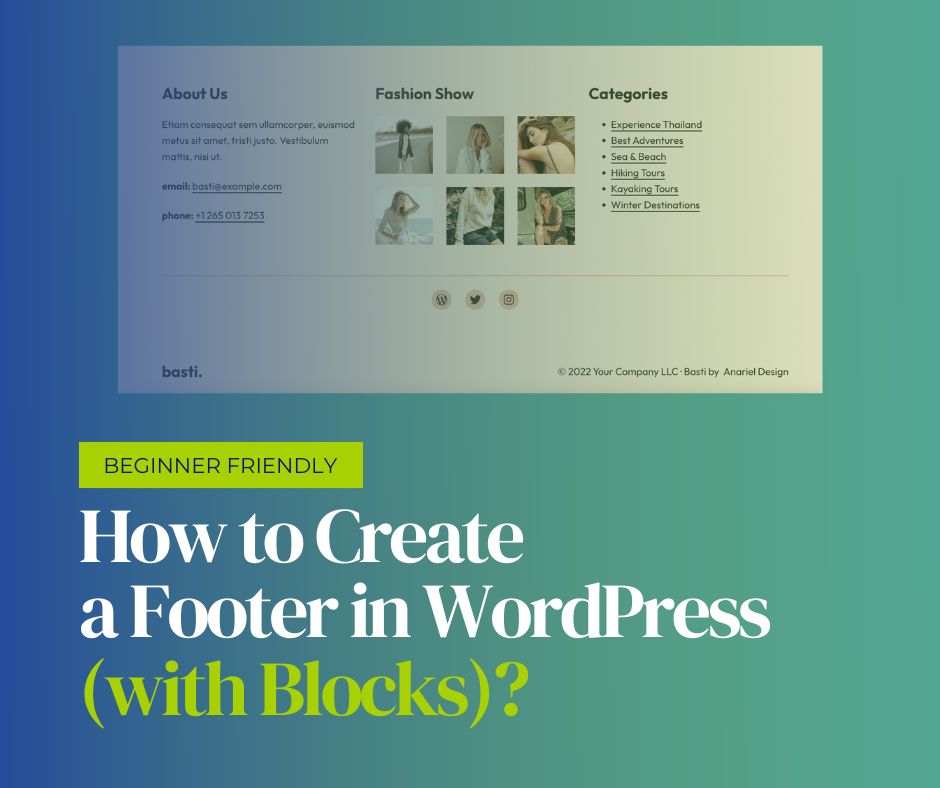
Footers can be super simple with just one or two columns, but also quite complex with multiple rows and columns. It really depends on what your project requires and what kind of information you want to convey in the footer. As an example, we’ll take our block-based FSE WordPress theme Basti. In the Basti theme demo you can see that we split the footer into three rows:
- Three Columns Content (with about info, gallery, list of useful links)
- Social Links Section
- Copyright & Site Title
This is maybe more than what your website might need but it’s easily adjustable as you’ll see in the next sections. Even if you require a more complex layout you can add elements to it with a few clicks.
Choose Your Footer Layout
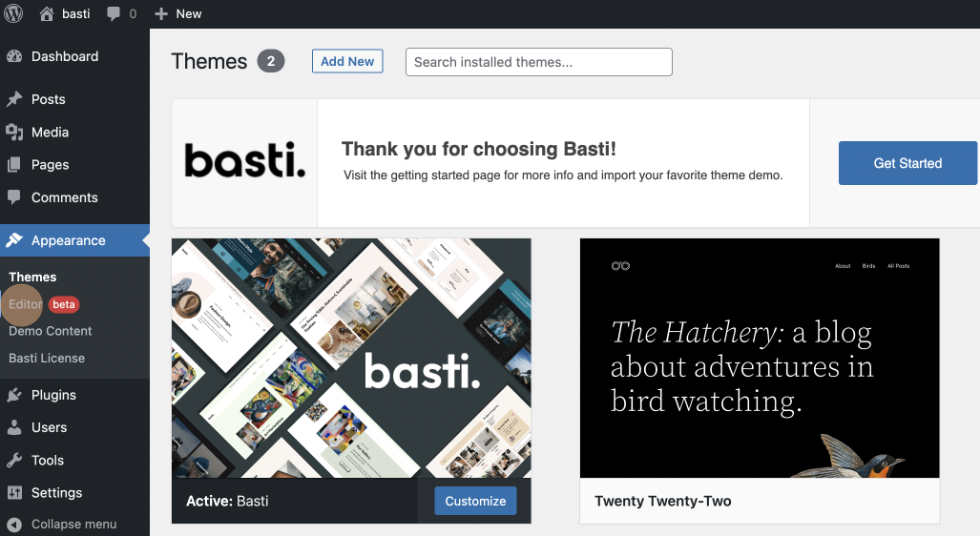
With a modern block, FSE WordPress theme like Basti or Bricksy Pro everything related to the footer is done from the new Site Editor. To access the editor navigate to your WordPress dashboard and there to Appearance->Editor as shown in the screenshot below.
Once you open the editor you’ll notice that it looks similar to the page and post block editor. However, they do two very different things so it’s important to tell these two editors apart. While the block editor enables you to add and customize content in your pages and posts, the site editor enables you to set up and customize headers and footers.

Basti theme includes around a dozen predefined footer layouts to choose from. To access these layouts select the footer area and then click Replace Footer.
You can also access the predefined footer layouts by using the block inserter + button in the top left corner and navigating to Patterns. Make sure to use the Explore option to get a better overview.
Once you find a predefined footer layout you like just click on it and it will be applied. Then you proceed with adjusting the individual elements.
Quick Tip: if you have a hard time selecting the whole footer use the List View and select the footer there.
If you use the list view it’s easy to see the whole structure of the footer. It is all put together using various blocks. The outside block is a Group block, followed by the inner Columns block and below it Site Logo, Socials & Row block with the Site Title and Paragraph blocks.
You can add/remove content to/from existing blocks, add or remove blocks and do various customizations for each block from the block settings tab.
Edit Content of the Footer Columns?
In the demo of the Basti WordPress theme, in the first footer column, there’s a short About and Contact info. The heading block is used for the heading and paragraph blocks for the address and text. In the second column, there is a gallery block and in the third column, a list block where you can add some useful links to your website.
The easy way to start is to simply start replacing the demo content with your own. However, if you want to use blocks different than the ones in the predefined layout you can easily replace them.
Inside each column, you can add a block that best fits the purpose you’re after. Just click on the + sign to find all the available blocks and select the one you want to add.
If you want to delete a block, there are 3 different ways.
- Select a block, click on the 3 dots and click Remove.
- Select a block and click the Delete key on your computer keyboard.
- Use the List View and select the block you want to delete and click on the 3 dots and then Remove.
Set up Socials and Copyright?
Social Icons Block
In our example footer under the 3 columns, you’ll find Social links. If you want to leave these just make sure to add links to your social profiles in the block settings. You can also add more social icons or delete some of the sample ones.
To add a new social icon click the + button and search for the social link blocks by typing the name of the social site into the search bar.
Copyright
Under Socials we had a row with the Site Title block on the left and the Paragraph block on the right. We used paragraph block to add copyright text, but you can use it to add anything else you see fitting for your website. You can also choose to use a different block instead of the paragraph.
Summary
With modern FSE block themes like Basti or Bricksy Pro creating and customizing the footer is a simple matter of choosing one of the predefined layouts that come with the theme and then arranging, adding, or removing blocks to your liking. Gone are the days of limited choices provided by the widgetized footers. Just like with the headers, FSE themes bring a lot to the table in terms of footer customizability and overall user experience. It might take a bit to get used to the new way of doing things, but I believe it’s well worth it.