
If you’re reading this then you probably already know that columns are the basis for creating more complex layouts in the WordPress block editor. To get the most out of the block editor, mastering the use of columns should be one of the priorities for any WordPress user. It is not hard by any means but the block editor does come with a lot of features and a few quirks that can get a bit confusing. In this guide, I’ll cover various ways in which you can use columns while trying to keep it simple so that, even if you’re completely new to WordPress, you’d be able to follow.
Before the WordPress block editor was first released in Dez 2018 it was impossible to create columns in the classic editor without using 3rd party solutions, most of which were also quite limited in functionality. With the block editor, the columns are not only just a few clicks away, but there is a variety of customization options that you can use to make them fit perfectly to your project. So, let’s get it going.
Basic Columns and Options
First things first. In your WordPress dashboard go to Pages, open a new page and give it a name. Now find the + icon in the left corner of the top toolbar and click on it. A sidebar will open and display the list of all the available blocks. Columns block is displayed under the Design category but you can also simply type the word columns in the search field and it will bring it up. Click on Columns to add the block to your editor window.
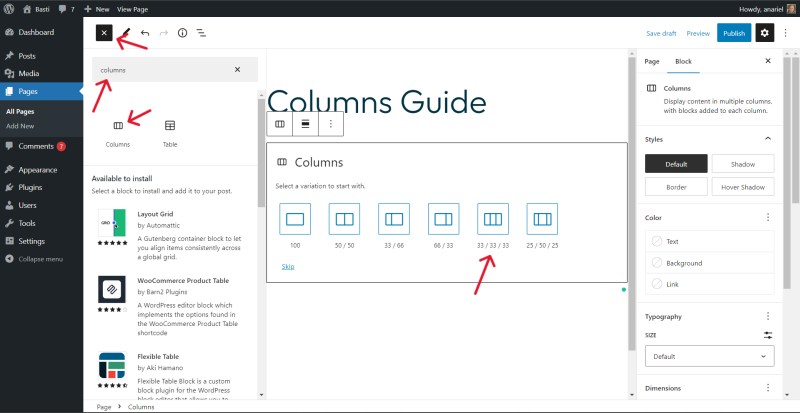
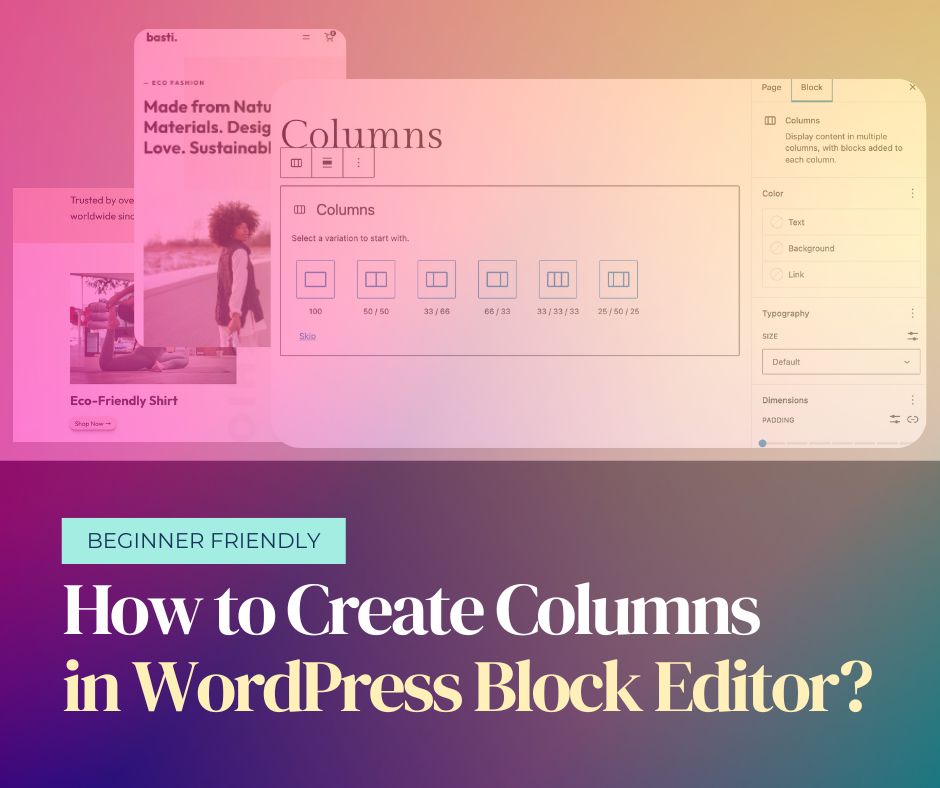
Now you’re presented with a few preset column layouts that you can choose from. For this example, I’ll select a common three-column layout ( 33/33/33 ). Once you selected the layout you’re back to the editor and the sidebar is closed.

The most simple thing we can do is to add some text to each column. To do that click on the + sign within each column and add a Paragraph block to it. When you added it you can start writing the text for each column and you’ll end up with a simple three columns of text.
This is not bad, but maybe you’d want to customize the text or its background to make it stand out. To do that click on the block you want to customize and in the block settings (in the right sidebar) you’ll see the available options. You can change text, background, and link colors, adjust the text size, and dimensions ( padding and margin ), and more.
There is also the toolbar that appears when you select each block. From that toolbar, you can adjust alignment, add links, and more. Play around with these options to test it all out.
Adding Blocks to Columns
You can, of course, add any block to a column, not just a paragraph. To do that we first need to select a single column. There are two ways to select a column:
- Click on the block within the column ( in this case paragraph ) and then in the toolbar click the first button from the left. This will take you up the hierarchy of the section. The first up from the block is the column ( you can also see it when you hover over it ).
- The other way to do it is to use the List View from the main top toolbar. This will open the whole structure of the blocks on the page and you can directly select the column you want.
Let’s now add a heading and an image to the first block. Click the + sign and choose the Heading block. You’ll notice that it will be added below the paragraph block and you’ll probably want to have it above it which you can easily do by using the arrows in the heading block toolbar.
We’ll add the image block in the same way. Select the column, click +, and choose the Image block. Within the image, block upload your image or select one from your media library. If your image is wider than the column it will adapt to the width of the column automatically. You can then use available image block options from the settings sidebar and the toolbar to customize it. You can also position it as you wish using the arrows.
Customizing Columns
Alright, now we have three columns and we added some content to them and explored the options for a couple of blocks we added. There are also some useful options for the Columns block as a whole that are worth exploring.
Let’s first select the columns block. As described earlier we can simply click on any block within the column and then use the far left button in the toolbar to take us up the hierarchy to the columns or use the List View to select it.
Once selected we see a set of features in the block sidebar and the toolbar that enable you to customize the look and the feel of your columns as a whole. Some of the options are theme dependent and some are editor’s default. Let’s check them out.
Styles
In the styles section, you can choose from preset options that are included with the theme. In this case, besides the default option, there are border, shadow, and hover shadow effect options. These add border, shadow, or add a shadow on hover to the whole columns section.
Columns
In the columns section, you can change the number of columns in a row with a simple slider. So, you can add a column or more, up to six columns. There is also an option to enable the stacking of columns on mobile, which in most cases is the way to go for better readability.
Important: if you start with three columns, as we did, add content to them, and then change the number of columns to less than 3 the column and its content will be deleted. Even if you switch back to three columns the content won’t come back. If this happens you can use the Undo feature in the main top toolbar to get back where you were.
Color
Here you can change text, background, and link colors for the whole columns section. Keep in mind that the colors you selected for blocks within each column have priority and this setting won’t affect these. It will only affect the default colors within these blocks.
When you click on i.e. text to change its color you are presented with the color presets that come with a WordPress theme ( used in the theme demo ) and enable you to quickly change between them. If you want to add a different color click on the current color on the top of the window to open a color picker. Besides being able to set a color with the second slider you can also adjust the opacity.
To reset all the changes you’ve done to the color of the columns click the three dots menu and then Reset All.
Typography
Similar to the color section, here we can adjust various aspects of typography. By default only the Font Size option is visible but you can enable other options from the three dots menu. Available options are Font Family (includes a few nice fonts included with the theme ), Appearance, Line Height, Letter Spacing, Decoration, and Letter Case.
Like with the color section settings the font settings for each individual block are prioritized over these settings.
Dimensions
In this section, you can adjust padding, margin, and block spacing for your columns ( click the three dots menu ).
Border
Here you can set border thickness and color as well as add border-radius to round the border edges.
Customizing Single Columns
Just like you can customize the Columns block as a whole you can customize each column individually. It’s the same procedure, select the column you want to customize and the block settings sidebar will appear with available options. The options are very similar to the ones for the Columns block.
Toolbar Options
You’ve probably already noticed that every block has its own toolbar that appears once you click on it. This is also true with columns. Let’s see what we can do with the options in the toolbar.
Columns Toolbar
In the columns toolbar, we have a couple of nitty options.
We have the option to drag the whole section and drop it somewhere else on the page. With the arrows, we can move the columns down or up. Keep in mind that these two options will appear only if besides the columns you also have other blocks on the page, above or below.
Then we can align the width of the columns block. By default, it has a column width set by the theme. By selecting Wide Width the width will adjust to the width of the theme’s content container. If you select Full Width the columns will stretch the whole width of the page.
Vertical alignment is something you need to test to see what’s happening. In short, the position of the content of columns with less content will adjust in regard to the column with the most content. In the screenshot below you can see what happens to our columns when I select the Align Middle option.
Besides these main options, there are a couple of additional options when you click the three dots menu on the right side of the toolbar. Most are self-explanatory and will not be covered in this guide.
Single Column Toolbar
Single column toolbar has a bit different set of options, but in general, it’s very similar.
You can move a column left or right, drag and drop it somewhere and adjust vertical alignment. There are also additional options in the hidden three dots menu.
Summary
Columns are one of the most used layout elements to present the content in an organized and accessible manner. Now that you know the basics of how to create columns in WordPress it’s your turn to play around with available options and come up with exciting layouts for your site.
When using columns it is important to keep in mind the hierarchy of blocks; the Columns block is at the top, then comes the Column block, and at the end various blocks within the column ( like image, heading, etc. ). As these are all essentially blocks, each comes with its own set of options and toolbar that appear when you select it. So you can customize each block within a column, each column within columns, and then the whole columns block.
This gives so many design options, but it also takes time and design talent to do it from scratch. This is where professionally designed block-based themes like Basti or Bricksy Pro come into play. They come with a wide selection of predefined block and page patterns that can easily be added to any page or post and then adjusted to fit your brand using the available options. Have a great day!